






Verinomi Panel: Creating an Account, Sign-in, Home Page, Search and Notifications
The Verinomi client area lets you manage your services, domains, receipts and support tickets in one place. This article explains how to create an account, how to log in, what you will find on the home page, and how the menu, search and notifications work.
Creating an account
On verinomi.com, click the Sign up button at the top right. The Create Account page has four steps; click Next to move on from each one:
- Contact details: first name, last name and mobile phone. For a company account, enter the person authorized to act on behalf of the company. Password resets and security codes are sent to this number. If you enter a Turkish mobile number, a verification code may be sent to it; enter the code and click Verify.
- Account details: Individual or Corporate account, your email address and the details needed for invoicing. For a corporate account, choose a legal entity or a sole proprietorship and enter the company name, tax number (Turkish ID number for a sole proprietorship) and tax office.
- Billing address: address, country, province, district, postal code and currency.
- Password and consent: choose your password, accept the terms of service and click Sign up. SMS notifications and promotional emails are optional.
Your details must be accurate and complete. Your invoices and domain registrations are made with them. If you lose access to your account, we also use them to confirm that the account is yours. If your details change later, you can update them as described in Profile, Sign-in E-mail and Billing Details.
Logging in
On verinomi.com, click the Log in button at the top right. Enter your email address and password, then click Log in.
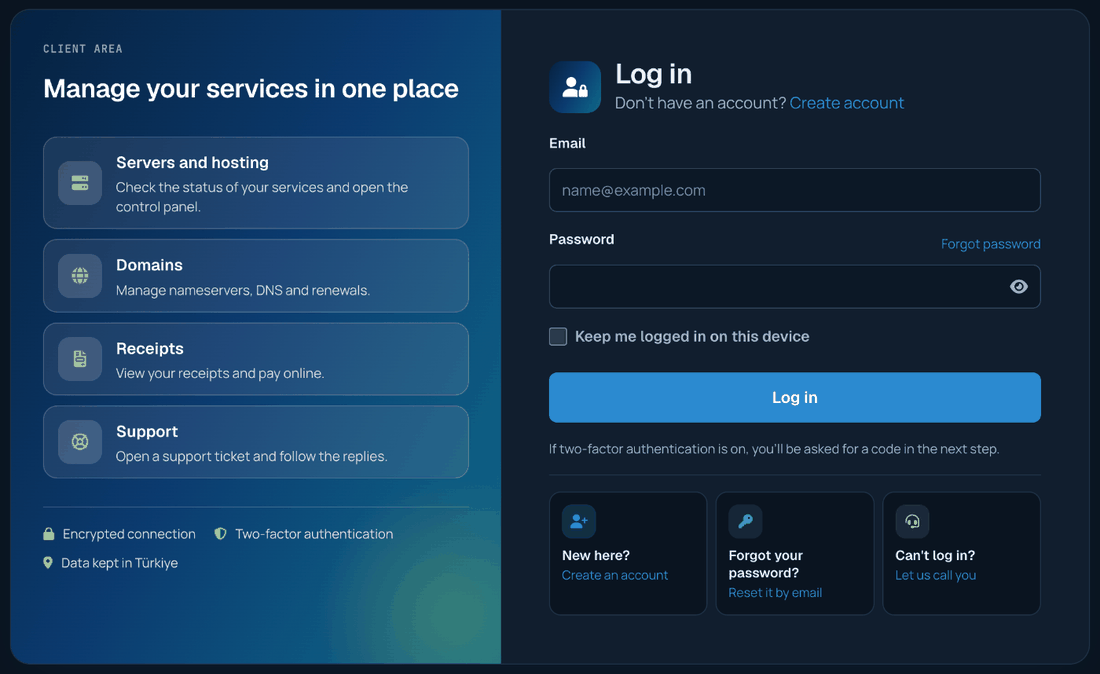
- Keep me logged in on this device: you can tick this on your own computer; please do not tick it on shared devices.
- Forgot your password?: you can reset your password with the link next to the password field; see Changing Your Password and Forgotten Password for details.
- If two-step verification is on, you will be asked for a code in the next step; see Two-Step Verification (SMS and Authenticator App) for details.
- If you cannot log in, you can leave your details with the Let us call you link on the login page, and our team will get in touch with you.
- You cannot log in to the client area with an account that has been closed; the login page shows "Your account has been closed, so you cannot sign in to the client area" and no verification code is sent. If you think this is a mistake, you can write to bilgi@verinomi.com.
Your logins are listed with their time and IP address on the Account > Activity history page. If you see a login you do not recognise, you can change your password right away.
Home page
After you log in, the client area home page opens. From top to bottom you will see:

- Welcome area: the New order and Open a ticket buttons, and your available credit (Add credit).
- Unpaid Receipts: if you have unpaid receipts, their number and total amount are shown, with overdue ones marked separately. You can pay with Pay now, or if you paid by bank transfer, let us know with I paid by transfer. Hover over the amount to see the receipt items.
- Pending Actions: internal transfer requests waiting for your approval, support tickets we have replied to, .tr domains waiting for documents, domains expiring within 30 days and services with an upcoming renewal date.
- Overview: the number of active services, active domains, unpaid receipts and open support tickets; you can click any of them to go to the related page.
- Account security cards: the status of two-step verification and your mobile number, plus the time and IP address of your previous login. If your billing details are incomplete, a Complete your billing details card also appears here.
- Your services: your active, suspended and pending services and your domains. You can filter by type with the buttons at the top (Servers, Hosting, Domains, Licenses, Other), use the search box or click the Name, Status and Renewal headings to sort. Filtering, search and sorting work across your whole account; the table shows the first 12 results. Hover over a renewal date to see the time left.
- Your recent support tickets, Quick actions, a domain search box and the latest announcements.
If you have not turned on two-step verification, a window suggesting it may appear on the home page. If you choose Remind me later, the window appears again after 7 days.
Menu
The left menu holds every section of the client area, organised in groups. Click a group heading to open its links:
- Services: My services, IP management, Firewall (if you have the service), Renew a service, New order
- Domains: My domains, Buy a domain, Transfer a domain, Renew a domain
- Accounting: Receipts, Bank payments, Account statement, Add credit
- Support: My tickets, Open a ticket, Knowledge base, Announcements, System status
- Account: Billing details, Profile, Password, Security, Users, Contacts, Emails sent, Activity history, Notification history, Internal transfer
The numbers next to the group headings show items that need your attention: domains expiring within 30 days, unpaid receipts (red if overdue), support tickets we have replied to and incoming internal transfer requests. You can make the menu smaller with the collapse button. On a phone, the menu opens with the button at the top left, and there are shortcuts at the bottom for Overview, Services, Domains, Receipts and Support.
With the Report a problem / idea link at the very bottom of the menu, you can tell us about a problem you have noticed in the client area or share a suggestion.
Search
You can search the whole client area with the search box in the top bar. You can also open it by pressing / or Ctrl + K (Cmd + K on a Mac). Once you type at least 2 letters, results appear in groups:

- Pages: client area pages, found with words such as "payment notification", "password", "sms" or "statement"
- Services: domain, product name or IP address (including extra IPs)
- Domains
- Receipts: by receipt number or item name (for example "ssl" or a domain)
- Support tickets: ticket number, subject or the content of the conversation
- Knowledge base articles and announcements
You can move through the results with the arrow keys, open one with Enter and close the search with Esc. Search only looks through your own records; your recent searches are remembered in your browser.
Notifications
The bell in the top bar shows things that need your attention: unpaid or overdue receipts, support tickets we have replied to, services and domains coming up for renewal, internal transfer requests waiting for your approval, attack protection applied to your IP address and replies to your client area messages. The number on the bell is the number of open notifications. Click a notification to open the related page. Once the situation is resolved (for example, when a receipt is paid), the notification disappears from the bell.
Notification history
The Notification history link at the bottom of the bell (or Account > Notification history) shows all notifications from the last 90 days: when each one arrived, its type and when it was resolved. You can filter by type and status (open / resolved). See Activity History, Notification History and Sent E-mails for details. The Notification preferences link just below it opens the page where you choose which emails you receive.
Tools
On the Tools page in our site menu you can find free network and e-mail tools: Mail Tester, E-mail Migration, WHOIS Lookup, IP Lookup, DNS Report, NTP Time Server, Open Source Mirror and Looking Glass.
Language and appearance
- Language: you can switch between Turkish and English with the TR | EN button in the top bar. The same option is also in the account menu at the top right.
- Dark / light theme: you can change it with the moon (or sun) icon in the top bar. Your choice is remembered in this browser; if you do not choose, the client area follows your device's light / dark setting.
- Account menu: click your name at the top right to open Account details, Security, Switch account (if you have access to more than one account) and Log out.
